
Key Takeaways
- Most common garage door issues can be fixed with basic tools and DIY knowledge, including noisy operation, alignment problems and opener malfunctions
- Regular maintenance of springs, cables, tracks and rollers is essential to prevent costly repairs and extend the door’s lifespan
- Safety precautions like disconnecting power, securing moving parts and using proper lifting techniques are crucial before starting any repairs
- Attempting diy repairs can be dangerous and may cause further damage, leading to higher costs than hiring professionals.
- Key components requiring regular inspection include door balance, hardware tightness, weatherstripping condition and sensor alignment
- While diy repairs may seem like a way to save money, hiring professionals for complex issues is often safer and more cost-effective.
- Professional help should be sought for complex repairs involving torsion springs, extensive track damage or major electrical issues
A malfunctioning garage door isn’t just an inconvenience—it’s a security risk that needs immediate attention. Whether it’s making strange noises, moving sluggishly, or refusing to open altogether, garage door issues can disrupt your daily routine and compromise your home’s safety.
You’ll be pleased to know that many common garage door problems have straightforward solutions you can tackle yourself. From loose hardware to misaligned tracks these repairs often require basic tools and a bit of know-how rather than an expensive service call. Before you reach for the phone to call a professional let’s explore the essential steps to diagnose and fix your garage door issues safely and effectively.
Common Garage Door Problems and Their Signs
Identifying garage door issues early prevents costly repairs and maintains security. Early detection of operational issues can also prevent further complications. Here are the main problems to watch for:
Strange Noises During Operation
Unusual garage door sounds indicate specific mechanical issues:
- Grinding noises signal worn bearings in the rollers or pulleys
- Popping sounds indicate torsion spring problems or loose hardware
- Squealing occurs from lack of lubrication on metal components like hinges tracks or rollers
- Rattling points to loose nuts bolts or brackets on the door assembly
- Scraping sounds reveal misaligned tracks or damaged rollers
Door Won’t Open or Close Properly
Several issues cause operational failures:
- Dead transmitter batteries or a malfunctioning wall switch can also prevent the door from operating
- Misaligned photo eye sensors trigger safety reversals
- Broken torsion springs create resistance during lifting
- Damaged cables cause the door to hang unevenly
- Blocked tracks stop smooth door movement
- Faulty limit settings prevent complete opening or closing
Many modern garage doors can also be operated from your car, so issues with the car’s remote system or its integration with the opener can cause similar problems.
Uneven Movement or Alignment Issues
Alignment problems manifest through these signs: Misalignment can significantly affect the door’s movement, leading to uneven operation and increased wear.
- Gaps between the door and floor when closed
- Door hanging at an angle during operation
- Binding or catching in the tracks during movement
- Visible bending in the vertical or horizontal tracks
- Rollers jumping out of their tracks
- Door panels showing uneven spacing or misalignment
Issue Type | Warning Signs | Potential Causes |
|---|---|---|
Noise | Grinding Squealing | Worn Parts Lack of Lubrication |
Operation | No Movement Reversal | Dead Batteries Blocked Sensors |
Alignment | Gaps Binding | Track Damage Broken Springs |
Essential Tools and Materials Needed
Repairing a garage door requires specific tools, materials, and safety equipment for effective maintenance and repairs. Using the right tools, and sometimes even professional tools, is essential for safe and effective work on garage door parts.
Safety Equipment
- Heavy-duty work gloves to protect hands from sharp edges and pinch points
- Safety goggles to shield eyes from debris and metal fragments
- Steel-toed boots for foot protection from falling parts
- A sturdy ladder with non-slip feet for reaching high components
- Protective face mask when working with rusty or dusty parts
Basic Hand Tools
- Socket wrench set with various sizes for nuts and bolts
- Adjustable wrenches (8-inch and 12-inch) for tightening hardware
- Needle-nose pliers for handling small parts and wiring
- Vice grips for holding components in place during repairs
- Drill with bits for mounting brackets and hardware
- Angle grinder for cutting metal parts when necessary
- File set (half-round and 4-way) for smoothing rough edges
- Curved snips for cutting metal sheets and trim
- Rubber mallet for track alignment adjustments
- Spring measure gauge for accurate spring sizing
Replacement Parts
- Springs: torsion or extension springs based on door type
- Rollers: nylon or steel options for smooth operation
- Cables: galvanised steel cables rated for door weight
- Hinges: heavy-duty steel hinges for panel connection
- Weather seals: bottom and side seals for insulation
- Track brackets: mounting hardware for securing tracks
- Pulleys: cable pulleys for extension spring systems
- Fasteners: various screws nuts and bolts for securing components
Safety Precautions Before Starting Repairs
Garage door repairs require specific safety measures to prevent accidents and injuries. Working with high tension components can be extremely dangerous and may result in serious injury if not handled properly. Follow these essential precautions before beginning any repair work. Attempting diy repairs without proper knowledge and precautions increases the risk of accidents.
Disconnecting Power Supply
Remove all power sources from your garage door system before starting repairs. Unplug the automatic opener from the electrical outlet or turn off the corresponding circuit breaker in your home’s electrical panel. Test the door’s power status by pressing the wall-mounted button or remote control to confirm complete disconnection.
Securing Moving Parts
Lock the garage door in a fully open or closed position using C-clamps or locking pliers. Place the clamps on both sides of the door track just below the bottom roller to prevent unexpected movement. Remove or secure loose components such as cables springs or rollers that show signs of wear to prevent sudden releases or drops.
Proper Lifting Techniques
Position your body correctly when lifting garage door components. Keep your back straight feet shoulder-width apart and bend at the knees rather than the waist. Maintain a firm grip with both hands and lift using your leg muscles. Use a mechanical aid like a dolly or lifting bar for components weighing more than 15 kg.
Component Weight Guidelines | Maximum Safe Lift |
|---|---|
Individual lifting limit | 15 kg |
Two-person lifting limit | 25 kg |
Mechanical aid required | > 25 kg |
- Stand directly in front of the item you’re lifting
- Keep the load close to your body
- Avoid twisting movements while lifting
- Set down items with the same careful technique used to lift them
Inspecting and Diagnosing the Problem

Identifying garage door issues through systematic inspection enables quick and accurate repairs. The inspection process involves three key areas: visual checks, balance testing and hardware examination. Understanding these steps is crucial whether you plan to repair a garage door yourself or seek professional help. Many common issues can be addressed with simple diy fixes, but some jobs require more expertise.
Visual Inspection Checklist
Start the inspection at ground level and work upward to spot visible damage:
- Track Alignment: Examine the vertical tracks for bends gaps or loose mounting brackets
- Spring Condition: Look for rust breaks or stretching in both torsion and extension springs
- Cable Status: Check for fraying worn spots or loose connections at both ends
- Roller Assessment: Inspect each roller for cracks chips or excessive wobbling
- Weather Stripping: Search for tears gaps or hardened sections along door edges
- Door Surface: Examine panels for dents cracks or water damage
- Hardware Tightness: Test all nuts bolts and fasteners for secure attachment
Testing Door Balance
Proper door balance reduces strain on the opener and extends component life:
- Disconnect Power: Unplug the opener or pull the emergency release cord
- Manual Operation: Lift the door halfway and release it
- Balance Check: The door stays in place when properly balanced
- Movement Test: The door moves smoothly without resistance or jerking
- Weight Distribution: Even weight distribution across both sides indicates correct balance
Checking Hardware and Components
Examine mechanical parts for wear and proper function:
- Hinges: Test each hinge for tight connections and smooth movement
- Rollers: Rotate each roller to check for binding or excessive play
- Springs: Measure spring length on both sides to verify equal tension
- Chain/Belt: Check tension and alignment of the drive mechanism
- Safety Sensors: Verify sensor alignment and clean lenses
- Control Panel: Test wall buttons and remote functionality
- Limit Switches: Confirm proper setting of open/close limits
Repairing Door Springs
Garage door springs are critical components that counterbalance the door’s weight and enable smooth operation. Testing and maintaining proper spring tension ensures safe and efficient door movement. Springs should only be repaired or replaced by those with proper training, as an incorrect attempt can be hazardous.
Testing Spring Tension
Spring tension testing reveals whether your garage door operates with correct balance and resistance.
Position the door at chest height
- Release the door gently
- A balanced door remains stationary
- A door that slams indicates insufficient tension
- A door that resists closing signals excessive tension
Lift the door 45 centimetres (18 inches)
- Let go of the door
- Watch for the door to stay in position
- Falling indicates low tension
- Rising shows high tension
Replacing Broken Springs
Broken spring replacement requires precise steps to maintain safety and functionality:
Prepare the workspace
- Unplug the automatic opener
- Remove all power sources
- Secure the door with C-clamps
- Place clamps above the bottom roller
Remove old springs
- Loosen the set screws
- Mark the position of spring coils
- Detach the springs from brackets
- Clear debris from mounting points
Adjusting Spring Balance
Access adjustment points
- Locate the winding cone
- Insert appropriate winding bars
- Mark starting position
- Maintain firm grip on tools
Make adjustments
- Turn clockwise to increase tension
- Quarter-turn increments
- Test after each adjustment
- Secure set screws firmly
Spring Type | Lifespan (Cycles) | Weight Capacity (kg) |
|---|---|---|
Torsion | 15,000-20,000 | 150-350 |
Extension | 10,000-15,000 | 100-250 |
Fixing Door Tracks and Rollers
Faulty tracks and rollers cause garage doors to operate unevenly or jam during movement. Regular maintenance of these components prevents costly repairs and extends the door’s lifespan. Ensuring tracks and rollers are in the correct position and properly attached is essential to prevent further damage. When realigning, mark a straight line along the track to guide adjustments.
Cleaning and Lubricating Tracks
Clean garage door tracks with a mixture of warm water and mild detergent to remove dirt debris and old lubricant. Use a wire brush to scrub stubborn grime from track surfaces and wipe dry with a clean cloth. Apply a garage door lubricant or silicone-based lubricant along the entire length of the tracks, focusing on the roller contact points. Avoid using WD-40 or oil-based products as these attract dust and create sticky residue.
Realigning Bent Tracks
Examine track alignment by measuring the distance between tracks at three points:
- Top of the tracks: 32-36 inches apart
- Middle section: 30-32 inches apart
- Bottom near floor: 30 inches apart
Use a level to check vertical alignment. Place C-clamps above and below bent sections to stabilize the track. Tap the bent area with a rubber mallet to straighten minor bends. For severe misalignment replace the entire track section.
Replacing Worn Rollers
Remove old rollers by:
- Unscrew bracket bolts holding roller stems
- Extract rollers from tracks starting with bottom panels
- Insert new rollers into brackets
- Secure brackets with original hardware
- Test door movement manually
Roller Type | Lifespan | Cost Range (£) |
|---|---|---|
Nylon | 8-10 years | 15-25 per set |
Steel | 4-6 years | 10-20 per set |
Sealed Bearing | 12-15 years | 30-45 per set |
Choose sealed bearing rollers for quiet operation and extended durability. Replace rollers in sets to maintain balanced door movement.
Garage Door Opener Repairs
Garage door opener malfunctions require systematic troubleshooting to identify and fix specific components that affect the door’s operation. Check that the motor unit is properly installed and all connections are secure. When testing, use the wall-mounted button to push the opener and observe its response.
Motor and Chain Issues
Disengaging the emergency release confirms if the door moves smoothly without power. A manual test reveals whether the issue lies in the opener mechanism or the door structure.
Key fixes include:
- Tightening loose mounting brackets and drive chain
- Lubricating the chain with silicone-based lubricant
- Adjusting chain tension using the adjustment screw
- Replacing worn motor gears or damaged drive belts
Remote Control Problems
Remote control issues stem from simple battery problems to complex signal interference.
Quick solutions include:
- Replacing remote batteries with fresh alkaline cells
- Reprogramming the remote by pressing the learn button
- Clearing the opener’s memory and resetting all remotes
- Testing the wall-mounted control panel separately
- Checking for nearby interference sources like LED lights
Sensor Alignment and Testing
Proper sensor alignment prevents the door from closing unexpectedly.
- Clean photo eye sensors with a soft cloth
- Verify LED indicators are illuminated on both sensors
- Adjust sensor brackets until lights stay solid
- Test sensor function by placing an object in the doorway
- Check wire connections at sensors and opener unit
Component | Normal Operation Signs | Warning Signs |
|---|---|---|
Motor | Quiet humming | Grinding noise |
Chain | Minimal slack | Visible sagging |
Sensors | Solid LED lights | Blinking LEDs |
Remote | Instant response | Delayed reaction |
Cable and Pulley System Maintenance
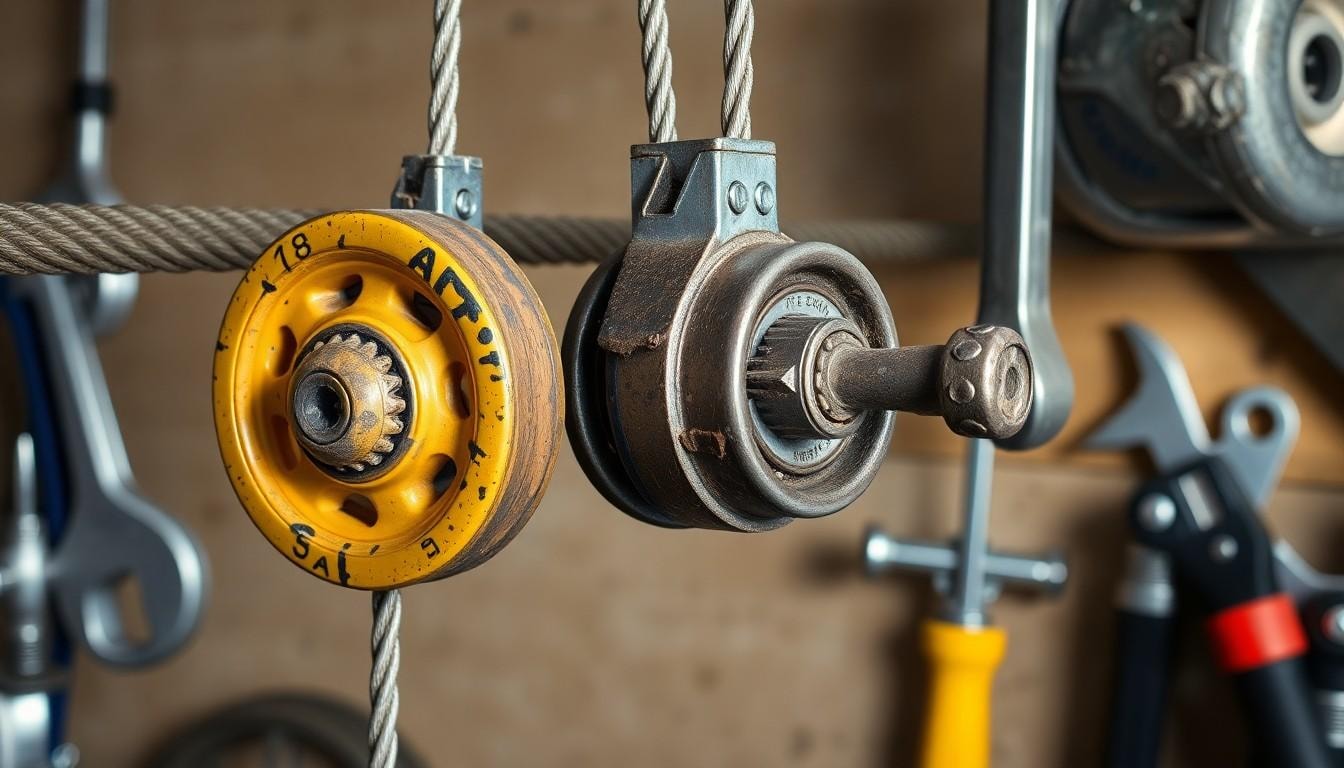
Regular maintenance of your garage door’s cable and pulley system prevents mechanical failures and extends the door’s lifespan. Cables and pulleys are high tension components and should be replaced with caution to avoid injury.
Inspecting for Wear and Damage
A thorough inspection of your garage door’s cable and pulley system involves checking specific components:
- Check cable integrity: Look for frayed strands damaged sections or rust spots along the entire length of the cables
- Test cable tension: Pull the cables gently to verify equal tension on both sides
- Examine pulley alignment: Confirm the cables sit properly in the pulley grooves without rubbing against edges
- Monitor door movement: Listen for grinding squealing or clicking noises during operation
- Inspect mounting brackets: Check for loose bolts bent metal or rust around cable connection points
Cable Replacement Steps
Follow these steps to replace damaged garage door cables:
Secure the door:
- Open the door completely
- Place locking pliers on both tracks below the rollers
- Disconnect the automatic opener
Release spring tension:
- Remove tension from torsion springs using winding bars
- Mark the spring position on the torsion tube
- Loosen set screws carefully
Replace cables:
- Remove old cables from drum and bottom brackets
- Install new cables starting at bottom brackets
- Wind cables onto drums maintaining equal tension
Pulley System Adjustments
- Centre alignment: Position pulleys directly above the vertical tracks
- Height settings: Adjust pulley brackets to match door height requirements
- Cable tensioning: Set equal tension on both sides using adjustment bolts
- Track clearance: Maintain 1.3 cm space between cables and vertical tracks
- Lubrication points: Apply silicone-based lubricant to pulley bearings monthly
Component | Inspection Frequency | Lifespan |
|---|---|---|
Cables | Monthly | 5-7 years |
Pulleys | Quarterly | 10-12 years |
Brackets | Bi-annually | 15-20 years |
Weatherstripping and Insulation Repairs
Effective weatherstripping and insulation maintain the garage door’s energy efficiency and protect against external elements. If your garage door is made of wood, consider applying a fresh coat of paint to protect it from moisture and improve its appearance.
Replacing Damaged Seals
Replace worn or damaged seals to prevent water infiltration and heat loss. Here’s how to replace the bottom seal:
Gather Essential Tools:
- 4-in-1 screwdriver
- Cordless driver
- Utility knife
- Galvanised nails or screws
- Rubber bottom seal gasket
- Tape measure
Prepare the Door:
- Disconnect the automatic opener
- Lift the door to eye level
- Secure it with C-clamps
Remove Old Seal:
- Cut away the existing seal with a utility knife
- Clean the track with soapy water
- Dry thoroughly before installation
Install New Seal:
- Measure door width
- Cut new seal to size plus 5cm extra
- Slide seal into track
- Secure with galvanised nails
Fixing Gaps and Drafts
Address gaps and drafts to improve energy efficiency:
Inspect Door Alignment:
- Check door level with spirit level
- Measure gap spacing at corners
- Mark uneven areas
Adjust Track Position:
- Loosen track bolts
- Realign tracks vertically
- Tighten bolts securely
- Install Side Seals:
- Apply weatherstripping along vertical edges
- Cut to exact length
- Secure with screws every 30cm
Insulation Panel Replacement
Replace damaged insulation panels to maintain temperature control:
Remove Damaged Panels:
- Release retaining clips
- Extract old insulation
- Clean panel cavity
Install New Panels:
- Cut insulation to exact size
- Insert into panel cavity
- Secure with retaining clips
- Seal edges with weatherstripping tape
Type | R-Value | Thickness |
|---|---|---|
Polystyrene | R-4 | 2.5cm |
Polyurethane | R-9 | 4cm |
Mineral Wool | R-6 | 3.8cm |
Troubleshooting Common Issues
Garage door problems require systematic diagnosis and targeted solutions for effective repairs. While diy garage door repairs can seem appealing, mistakes can end up costing more money in the long run. Address these specific issues using the following methods:
Door Reverses Before Closing
The safety sensors trigger door reversal when detecting obstacles or misalignment.
- Check Photo Eye Sensors: Clean both photo eyes with a soft cloth to remove dirt buildup. Realign the sensors until both LED lights glow solid green.
- Adjust Close Force Setting: Locate the force adjustment dial on the opener unit. Turn it clockwise in small increments to increase closing power. Test the door after each adjustment.
- Remove Obstacles: Clear debris from the door track & threshold. Look for bent track sections causing friction points.
Manual Operation Problems
Manual operation issues stem from mechanical component failures.
- Test Door Balance: Disconnect the opener & lift the door halfway. The door stays in place with proper spring tension. Replace springs if the door drops or shoots up.
- Examine Track Condition: Look for:
- Bent sections
- Loose mounting brackets
- Missing roller guides
- Debris accumulation
- Check Hardware: Tighten loose nuts & bolts. Replace broken hinges rollers & brackets.
Electrical System Issues
Power supply problems affect automatic operation.
- Power Source: Test the outlet with a working device. Check the circuit breaker for trips.
- Wiring Inspection: Look for:
- Frayed wires
- Loose connections
- Damaged control board
- Burnt motor components
- Control Systems: Test wall buttons & remotes. Replace batteries in wireless devices. Reprogram remotes if codes reset.
Component | Common Problem | Solution |
|---|---|---|
Photo Eyes | Misalignment | Realign until LEDs glow |
Springs | Tension loss | Replace in pairs |
Track | Bent sections | Straighten or replace |
Circuit | Power loss | Reset breaker |
Remote | Dead battery | Replace battery |
Professional Help Guidelines
When to Call an Expert
Professional garage door repair specialists handle complex issues that exceed DIY capabilities. Contact an expert for:
- Broken torsion springs which store high tension and require specialized tools
- Damaged or misaligned track systems beyond simple realignment fixes
- Electrical system malfunctions affecting the opener’s circuit board or motor
- Cable system failures that compromise the door’s balance
- Structural damage to the door panels or frame
Cost Considerations
Garage door repair costs vary based on specific components and labour requirements:
Repair Type | Average Cost (£) |
|---|---|
Spring replacement | 150-300 |
Track repair/replacement | 200-400 |
Cable replacement | 100-200 |
Opener repair | 150-350 |
Panel replacement | 400-800 |
Choosing a Qualified Technician
- Verify credentials: Check for valid certifications and industry affiliations
- Review experience: Look for technicians with 5+ years of garage door repair experience
- Insurance coverage: Confirm current liability insurance and worker’s compensation
- Written estimates: Obtain detailed quotes listing parts and labour costs
- Service guarantees: Request warranty information for parts and workmanship
- Response time: Choose companies offering 24-hour emergency services
- Customer reviews: Read recent testimonials from local customers
Maintenance Tips to Prevent Future Problems
Now you’re equipped with the knowledge to tackle most garage door repairs yourself. Regular maintenance is your best defence against future problems and costly repairs. Addressing minor issues in the first place can prevent major repairs down the line. By conducting monthly visual inspections checking hardware tightness and lubricating moving parts you’ll extend your door’s lifespan significantly.
Remember to prioritise safety above all else. If you’re ever unsure about a repair or encounter a complex issue it’s best to contact a qualified professional. They have the expertise and tools to handle challenging repairs safely and effectively.
Keep these repair techniques handy and you’ll be well-prepared to maintain your garage door’s smooth operation for years to come. A well-maintained garage door isn’t just about convenience – it’s an investment in your home’s security and value.
Frequently Asked Questions
How do I know if my garage door springs are broken?
Look for signs like the door feeling heavy when lifted manually, loud banging noises during operation, or gaps appearing between spring coils. A broken spring might also cause the door to open crookedly or not at all. If you notice any of these symptoms, it’s likely time to replace your springs.
What’s causing my garage door to make strange noises?
Strange noises usually indicate mechanical issues. Squealing often means the rollers need lubrication, grinding suggests damaged bearings or rollers, and popping sounds typically indicate spring problems. Regular maintenance and lubrication can prevent most noise-related issues.
Why won’t my garage door close completely?
This issue commonly stems from misaligned safety sensors, obstructions in the door’s path, or incorrect limit settings. Check if anything is blocking the sensors, clean them regularly, and ensure they’re properly aligned. If the problem persists, the limit settings on your opener might need adjustment.
How often should I maintain my garage door?
Perform basic maintenance every three to six months. This includes lubricating moving parts, tightening hardware, checking springs and cables for wear, and testing the safety features. Professional inspections are recommended annually to catch potential issues early.
When should I call a professional instead of DIY repair?
Contact a professional for complex issues like broken torsion springs, bent tracks, cable replacements, or electrical problems. Also seek expert help if the door is off its tracks or if you notice structural damage. These repairs require specialised tools and expertise to ensure safety.
How can I test if my garage door is properly balanced?
Disconnect the opener and manually lift the door halfway. A properly balanced door should stay in place without support. If it falls down or shoots up, the springs need adjustment. This test should be performed regularly to ensure optimal operation.
What’s the average lifespan of a garage door opener?
A quality garage door opener typically lasts 10-15 years with proper maintenance. However, factors like usage frequency, climate conditions, and regular maintenance can affect its longevity. Replace the unit if repairs become frequent or costly.
How can I improve my garage door’s energy efficiency?
Install weatherstripping around the door frame, replace worn seals, and add insulation panels to the door. Check for gaps or drafts regularly and repair them promptly. These measures help maintain temperature control and reduce energy costs.
